


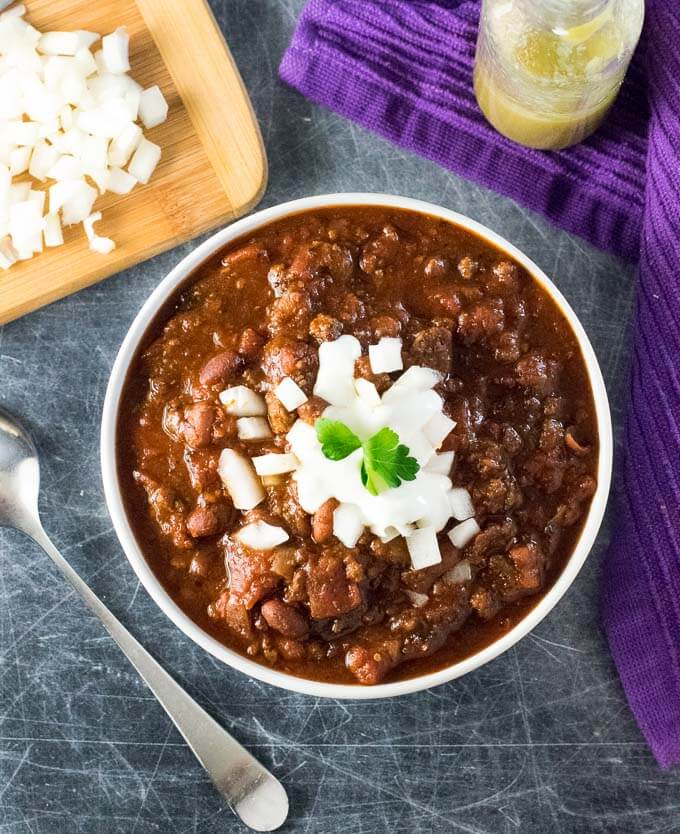
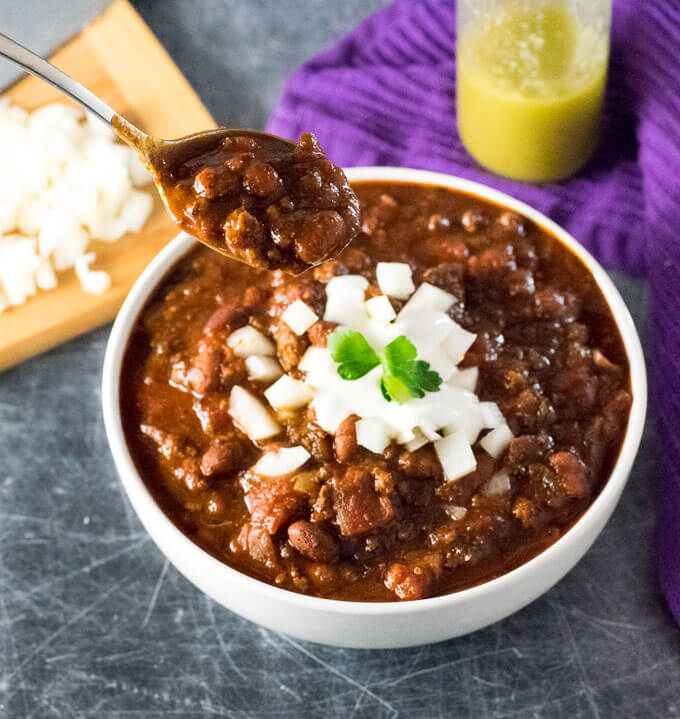
Grab some frozen venison from your freezer and let's make some thick and hearty venison chili, perfectly seasoned with a homemade blend of spices. Whether you are serving this to warm up a deer camp full of chilled hunters after a long day in the woods, or simply gathering the family around the dinner table, this deer chili recipe will have everyone asking for seconds!
Ingredients and Substitutions
- Ground venison - You can use this recipe with any wild game meat or ground beef.
- Olive oil
- Canned Diced Tomatoes - Fire-roasted tomatoes would be a phenomenal substitute if you can find them.
- Canned Chili beans - Chili beans are sold at the grocery store in mild, medium, and hot spice levels. Simply purchase the heat level that fits your family's preferences.
- Canned Tomato Sauce
- Canned Tomato Paste
- Red Onions - Yellow onion or sweet onion would be great substitutes.
- Poblano Peppers - Substitute a green bell pepper for a mild chili or jalapeno peppers for a spicier chili.
- Garlic cloves
- Worcestershire sauce
- Beef broth - Beef stock is a great substitute.
- All purpose flour
- Homemade chili seasoning - Kosher salt, ground cumin, dried oregano, chili powder, onion powder, paprika, cayenne pepper, garlic powder, fresh ground pepper, and bay leaves.
How to Grind Venison Chili Meat
The secret ingredient that makes venison chili special is the ground venison of course. For venison, like beef, the ideal chili grind is coarse because it lends a better texture to the final chili. This differs from the grind used for venison burgers, for example, which is typically double ground using a finer plate. Simply ask your deer processor to run a few pounds of your venison for chili and he will know what to do.
Otherwise, if you grind your own meat, run some venison and pork fat through your coarsest grinding plate (8mm plate is great) in one pass then gently mix together. This will make phenomenal venison chili. I like an 80/20 blend of meat and fat because the fat will really carry a lot of the flavor of the seasonings.
However, I suspect most of you reading this already have your venison ground and packaged. Chances are the butcher ran it through the grinder twice on a medium grinding plate and blended it with a varying percentage of beef or pork fat. Don't fret, I use this meat all of the time, it will still make fantastic venison chili!

How to Make Venison Chili
I recommend using a large Dutch Oven when making chili because it will help you build layers of flavor. The wide base makes it ideal for browning your meat and vegetables, while its thick sides retain heat exceptionally well for long, even, simmers. I use a Dutch Oven for anything that will simmer for an hour or longer. However, a traditional soup pot will still work well for chili.
Heat your heavy pot on the stovetop over medium high heat and add the cooking oil. Once the oil is shimmering add the ground deer meat, onions, and peppers to the pot and saute until the vegetables are tender and the meat is well browned.
Note: When browning meat to make the best venison chili, you actually want a brown crust to form on the ground meat, or at least on the bottom of your pan. The browned bits will melt into the chili during the simmer, adding depth of flavor.
For this reason, I also add the garlic, tomato paste, and chili seasonings to the saute before the liquid is added. It helps the flavors bloom before swimming in broth and sauce. Cook together for two minutes, then add the rest of the ingredients to the pot. Stir everything together with your wooden spoon and simmer over low heat for three hours, uncovered.
Storing Leftovers
This is a great chili to make in advance. You will find the flavors meld together beautifully when left in the refrigerator overnight, making the leftovers even better the next day. It does have a tendency to thicken while sitting in the fridge, so thin it out with a few splashes of water if needed.
Store the chili in an airtight container in your refrigerator and enjoy it within five days. Alternatively, the cooked chili can be frozen in a freezer-safe container for up to three months. The easiest way to reheat the chili is to microwave it in individual servings or reheat everything in a pot on the stovetop.
Slow Cooker Venison Chili
Any chili recipe will taste best if cooked in a Dutch Oven, layering flavors as described above. However, you can make venison chili in a slow cooker by simply adding all of the ingredients together and letting it simmer away. It is an easy way to make chili, and it still tastes great. Although, if you are willing to take the extra effort to complete steps 1 & 2 of my recipe prior to adding everything to a slow cooker, you will be rewarded with a much richer flavor. Once all of the ingredients are added to your crock pot, set it on high for 4 hours or longer.

Best Venison Chili
Equipment
Ingredients
- 2 pounds Ground venison
- 1 tablespoon Olive oil
- 28 ounces canned Diced Tomatoes
- 30 ounces canned Chili beans with liquid
- 15 ounces canned Tomato Sauce
- 6 ounces canned Tomato Paste
- 2 Medium Red Onions (chopped)
- 2 Poblano Peppers (chopped)
- 4 Garlic cloves (minced)
- 1 tablespoon Worcestershire sauce
- 3 cups Beef broth
- 1 tablespoon Flour
Chili Seasoning
- 1 ½ tablespoon kosher salt
- 1 ½ tablespoon Cumin
- 2 teaspoons Oregano
- 2 teaspoons Chili powder
- 1 ½ teaspoons Onion powder
- 1 ½ teaspoons Paprika
- 1 teaspoon Cayenne Pepper
- 1 teaspoon Garlic powder
- ½ teaspoon Fresh ground black pepper
- 2 bay leaves
Optional Garnishes for Serving
- Chopped onion
- Sour Cream
- Shredded Cheddar cheese
Instructions
- Heat oil in a Dutch Oven or large pot and add venison, onions, and peppers. Cook on medium-high heat until meat has browned and onions and peppers are tender.
- Add garlic, tomato paste, and chili seasonings. Cook for two minutes longer, or until fragrant.
- Add remaining ingredients, stir together, and simmer uncovered over low heat for 3 hours, or until thickened to your liking.
- Ladle chili into bowls, sprinkle with desired chili toppings, and serve.
Notes
Nutritional Information
Don't forget to check out the rest of my mouthwatering venison recipes too!
This recipe was originally published on FoxValleyFoodie.com on February 2, 2018.
Matt D
How large of a portion are your nutrition stats for?
Sandra
I've made this chili recipe twice now, once with venison and once with longhorn beef, and it is now my husband's absolute favorite! Thank you.
Elsie S. Stewart
I tried this recipe and it's really good. I would definitely recommend it to anyone who wants to try the recipe.
Donna
There is a lot of great flavour however, it is way too salty. I will definitely cut the salt on half next time. I followed the recipe except I didn't use peppers or onions because of intolerances.
Jamie
This is my go to chili recipe. So much flavor in every bite. I have tried so many but always come back to this one. Thank you!
Alison S.
This is the best chili we have ever had. My husband literally said thank you to the bowl after he was done with his second helping. We as well did not get any deer on public land this year. Thankfully we had a friend give us a bunch of venison. But WOW! The flavor. The texture. The spice was perfect. I will be making this again! Perfect for the Packer game today!
Crystal
Could I do this in a crockpot?
Wanda Turner
Can you do this in crockpot and how please, I don’t want the meat to disappear in the chili
Fox Valley Foodie
Above the recipe card is a section titled "Slow Cooker venison chili" that explains exactly how to do it. 🙂
Lisa
Is the tablespoon and a half of salt correct? That seems like a lot! Is it 1 1/2 teaspoons?
Fox Valley Foodie
Yes, it is correct. Though do make sure it is kosher salt. If you are nervous, you can add less and continue to add more until it fits your tastes.
Robyn
Would red pablano peppers be too hot for this recipe? I was given some and am concidering using them...
Fox Valley Foodie
They would be perfect!
Celeste
I used 2 canned chipotle peppers (chopped) with 2 tablespoons of the sauce instead of the pablanos. Also used 2 cans of black beans instead of the chili beans. Followed the rest of the recipe and my husband said never to make a different recipe again - this was THE ONE. It was spicy but not TOO spicy.
Jamie
I’ve tried so many and this is the best chili recipe I’ve made
Perfect blend of spices