To truly be a master of all things breakfast, you need to know how to make an omelet. Not only simple to make, they are the perfect blank canvass to unleash your culinary creativity!
Ladies and gentlemen, I am having a moral dilemma. You see, I absolutely hate blog posts with a million process photos that you have to scroll through before you get to the recipe. I REALLY do. I would rather burn down this website before incorporating them into every post. I have always strived to limit my posts to no more than 2 or 3 photos, and that is primarily done just for visual interest to break up the paragraphs of text. However, I do not believe I can adequately describe how to make an omelet without visual cues. So for this one post, I will humbly accept defeat and submit to you a photographic step by step guide.
Please let me know in the comments below, how do you feel about blog posts showing step by step process shots?

Omelet Fillings
A classic omelet by itself is a tenderly thin blanket of cooked eggs that is great to eat on its own, but it is even better suited for customizing with your favorite flavors. A standard sized 2 egg omelet will fit ¼ - ⅓ cup of your choice of fillings. These can be sprinkled right into the omelet as it cooks, however due to the quick cooking time of omelets, you will want to pre-saute any fillings that need to be cooked prior to serving.
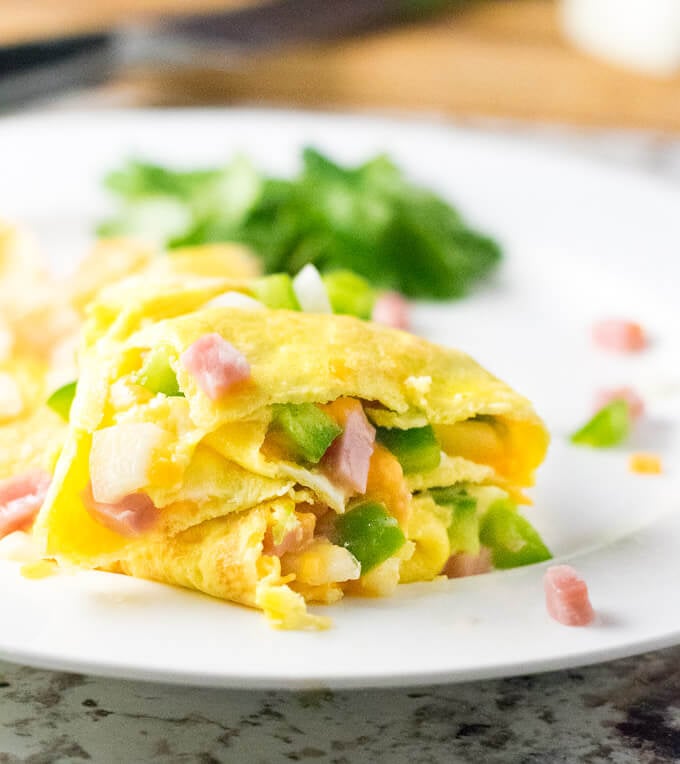
Fillings can include any of your favorite cheeses, produce, and meats. The classic combination I used in these photos is known as a "Denver Omelet" featuring diced ham, onions, peppers, and cheddar cheese.
Should I add liquid to an omelet?
Some omelet recipes call for the addition of milk or water. This is unnecessary. An omelet made with just eggs will cook up to be exceptionally tender on its own. Making an omelet with milk or water can make an omelet fluffier, which isn't always desired. Save adding liquid to making light and fluffy scrambled eggs.
Best Omelet Pan
You will want a quality non-stick skillet to make omelets. Nonstick is important because you do not want the eggs sticking to the pan. Personally, I think higher end skillets like Calphalon Unison and All-Clad are worth the money because not only are they exceptionally slick, they can be cleaned with just the quick wipe of a paper towel.
How to Make an Omelet
Making an omelet is a fairly quick and easy process, but the help of some visual aids makes it easier to understand. I make my omelettes very similarly to Julia Child. Not surprisingly, since I learned how to make them many years ago from [easyazon_link identifier="0307593525" locale="US" tag="foxvalfoo-20"]Mastering the Art of French Cooking[/easyazon_link].
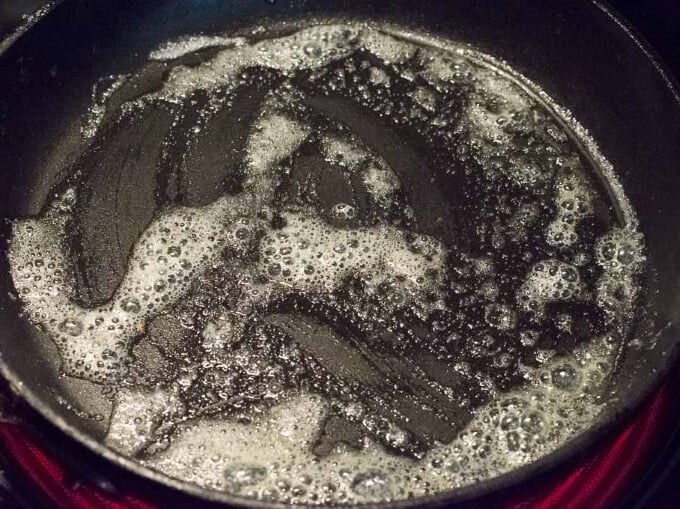
There are a few important steps to insuring success. First of all, you want a hot pan, but not so hot the butter is browned and burning. This will also cause your omelet to take on an unappetizing brown appearance. Instead, let the butter melt in a pan set over high heat. When it begins to foam lively, as shown above, you are ready to add the beaten eggs.
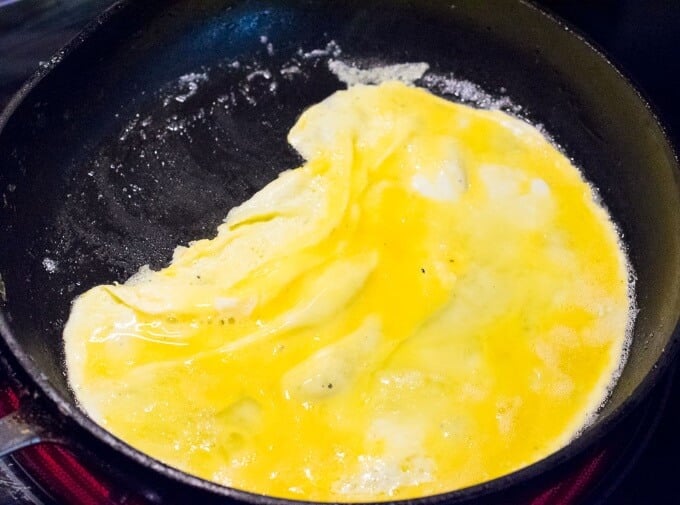
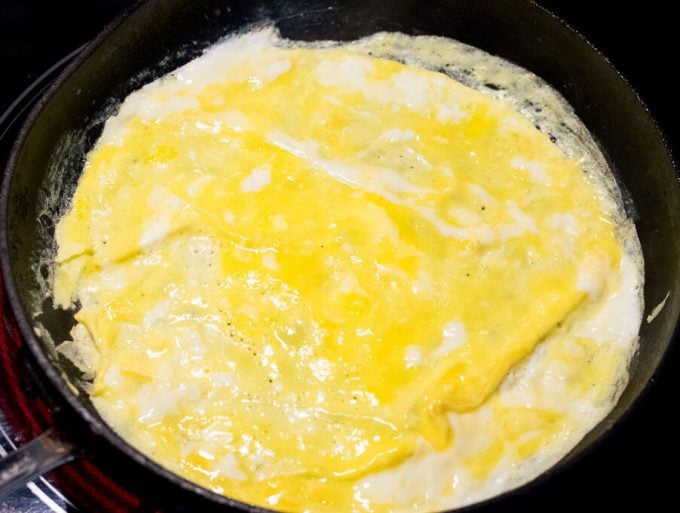
The next trick is to let the bottom of the eggs set in the pan, then move one edge of the omelet away from the side of the pan with a spatula. The reason for doing this is to help the omelet cook without it needing to be flipped. Simply tilting the pan will allow any excess uncooked egg pooling on the surface to fill the void on the skillet's surface and finish cooking with the rest of the omelet.

At this point you are ready to add any fillings. It is best to add them in a straight line along the top third of the omelet. This will ensure the omelet folds over them nicely when you begin to roll the omelet.

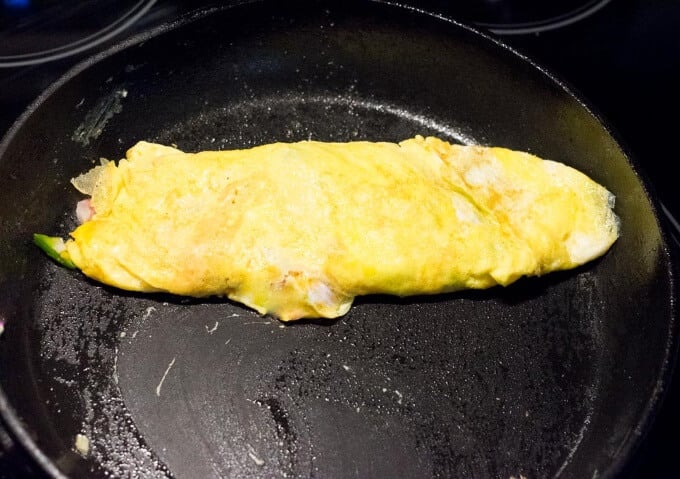
There are two ways you can roll the omelet. The easy way is simply to use a spatula to fold it over. However, once you get more confident in your cooking skills it is easiest to tilt the pan forward and give it a quick jerk back. This jerking motion will make the omelet jump off the side of the skillet and roll partially over on itself. Doing it one more time gives you a completely rolled omelet that is ready to be enjoyed!


How to Make an Omelet
Ingredients
- 2 eggs
- 1 tablespoon butter
- 1 pinch salt
- 1 dash pepper
- ¼ cup fillings of your choice
Instructions
- Add eggs to a bowl with salt and pepper and beat with a fork until blended.
- Heat non-stick skillet over high heat and add butter. Move the butter around to evenly coat the pan.
- When butter is foaming (but not yet browning) pour the beaten eggs into the pan and tilt the pan to ensure eggs are evenly spread out.
- After a few seconds, when the bottom of the omelet begins to set, use a spatula to move one edge of the omelet away from the side of the pan and then tilt the pan to allow any uncooked egg to fill the void.
- Add any desired toppings in a line across the top third of the omelet.
- Ensure the omelet is able to freely slide in the pan, use a spatula to loosen if needed. Then tilt the pan away from you and give it a quick jerk to fold the omelet partially over on itself. This can also be done with a spatula if desired.
- Repeat the previous step to fully roll the omelet over itself. All filling should now be inside the omelet.
- Gently pour omelet out onto a plate and serve.
Notes
If you enjoyed reading about How to Make an Omelet then you should probably like me on Facebook and follow me on Pinterest too. That’s what I would do at least, because if you don’t get to know me but you still use my recipe it is kind of like taking candy from a stranger, and your mom taught you not to do that. Don’t disobey your mom, subscribe to Fox Valley Foodie today.


Amy
Came out great 👍 ty
Nikki
It was perfect.
Jennifer Blanche Carter
Thank you for telling just recipe details and not a story! I will come back here for recipes because it’s much less stressful than other blogs with noisy stories
Karen
Just followed your recipe & my omelets turned out perfectly! All I used for filling was bacon bits I made myself & I grated cheddar cheese to add. Real cheese makes a tasty difference. The bacon was cooked in the microwave & I didn’t make it crisp so that it would work better in the omelet. Thanks for not having a long blog with stories & too many pics. Appreciated being able to focus on my task!
Marissa McGeorge
I agree that the visual aids were helpful!:) I think it's a great benefit to those who learn best visually. Thanks so much! I also appreciated the recipe being displayed in a traditional recipe format, as well. I thought it was helpful to have both! Very organized!
Maya
This was great! The visuals were a must and greatly appreciated! I’m on my way to make my omelette! Thanks for sharing!!!
Beth
Great demonstration. I feel empowered to give it a try! I strongly agree with you about paging and paging through innumerable photos searching for the recipe. In this case the extra photos were perfect in order to really demonstrate the technique.
Delphi
One of the many, many reasons I enjoy your blog so much is that I don't have to scroll through dozens of photos before reaching the recipe... Thank you so much!! I don't read blogs with tons of step-by-step process shots before the recipe - I find it too annoying, and more often than not, the photos are not at all helpful/useful.
Love your setup - just useful photos with lots of helpful info and a fabulous recipe is perfect. Keep up the awesome work! 🙂
Kathy
I agree with you 100%. Although I would add when the blog goes on and on about their kids are picky eaters.
Cleatress
1st time seeing your posts and thank you for step by step pictures. I’m one of those! Appreciate you!
Amy
First time making turned out awesome ty for posting. Will be on my list to make .
Like to post a picture of my omlette.
Linda Murray
Totally agree